Custom EQ Presets in Ampado
Found the perfect sound? With Ampado 6 you save it as your own preset and bring it back with a single click. You can sort, rename and share your presets as a file and take them with you to a new Mac.
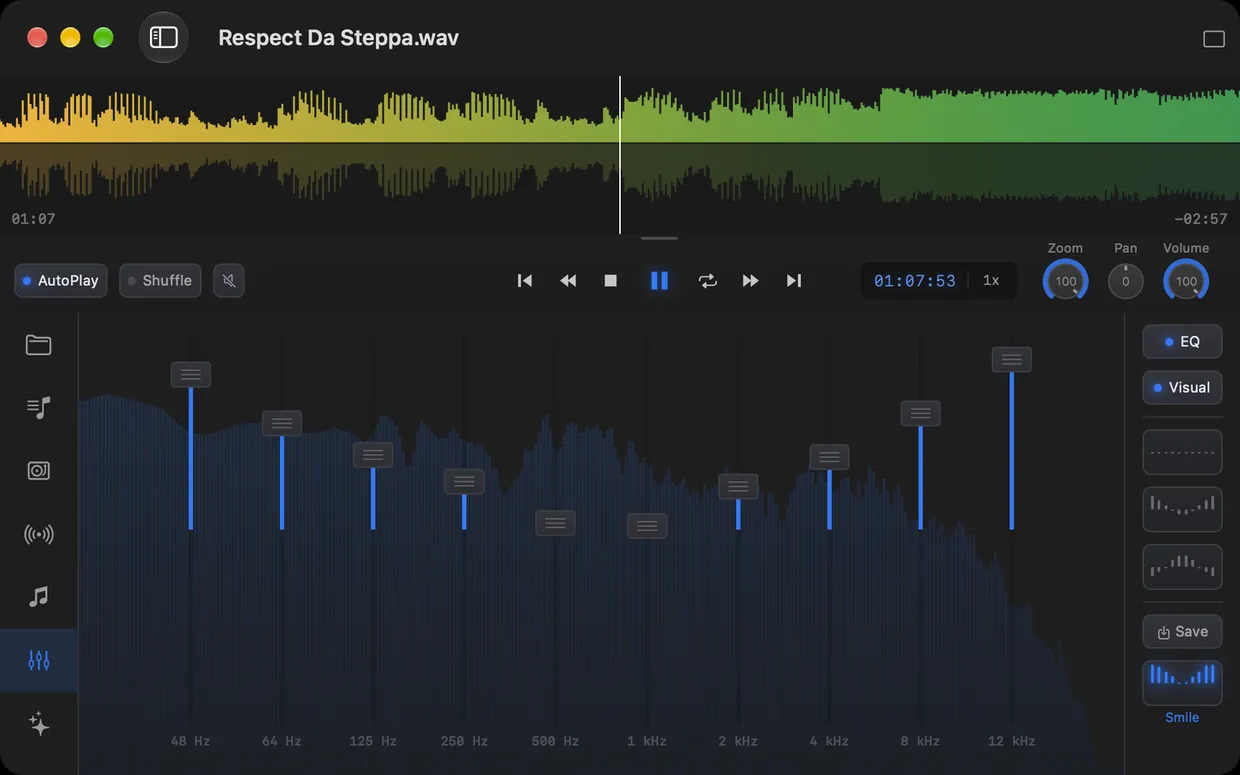
The equalizer in Ampado PRO with frequency display and a custom preset
Everyone hears differently, and every pair of headphones, every speaker and every room sounds different. An equalizer evens this out: a little more bass for small laptop speakers, less harshness for bright headphones or more clarity for podcasts. Until now you had to set the sliders again every time or settle for the built-in presets.
Version 6 puts an end to that. By popular demand, you can now save your settings in Ampado PRO as custom presets. In this article we show you how it works, how to share presets and take them to another Mac, and give you tips on what each frequency does.
The equalizer in Ampado
You find the equalizer in the Equalizer section of the sidebar. It has ten bands from 48 Hz to 12 kHz, and each can be boosted or cut by up to 12 dB. Behind the sliders, the frequency display shows live how your music is spread across the frequencies. That way you immediately see where it booms or where something is missing.
To the right, the EQ button turns the equalizer on and off, so you can quickly compare the original with the processed sound. Below it are three built-in presets: flat, a bathtub curve with boosted bass and treble, and a hump that emphasizes the mids. The equalizer works with your own files, in playlists, with the Auto-DJ and with internet radio, so with everything except Apple Music.
How to save your own preset
A custom preset takes just a few seconds:
- 1.Open the Equalizer section and play a song you know well.
- 2.Set the ten sliders the way you like.
- 3.Click Save on the right. A small window shows the curve of your current setting.
- 4.Enter a name, for example “Headphones” or “Podcast”, and confirm with Return.
Your preset appears as a button of its own below the built-in presets, with a small preview of the EQ curve and its name. One click loads it, and the active preset is highlighted in color. If the name already exists, Ampado asks whether you want to replace the existing preset.
Managing presets
Over time, quite a few presets add up. Here is how to keep track:
- •Rename: right-click a custom preset and choose Rename….
- •Adjust: change the sliders, then right-click and choose Overwrite with Current Setting.
- •Delete: right-click and Delete, and after a short confirmation the preset is gone.
- •Sort: drag a preset with the mouse to another position. Ampado remembers the order.
The built-in presets always stay unchanged. You also find all your custom presets in the main menu under Equalizer › Presets, so you can quickly change the sound even without the Equalizer section. That is handy when you are using the visuals or a compact mode.
Share presets and take them to a new Mac
Your presets can be saved as a file. That lets you take them to a new Mac or share them with friends, your band or in the studio:
- 1.Export: choose Export Custom Presets… in the Equalizer menu and save the file, for example “Ampado EQ Presets.json”.
- 2.Import: on the other Mac, choose Import Custom Presets… and open the file. Ampado tells you how many presets were imported.
If an imported preset has the same name as an existing one, the existing one is replaced. By the way, your presets are kept even when you reset Ampado’s settings. If you really want to get rid of all custom presets, you find the Delete All EQ Presets button in the settings under Advanced.
What does each frequency do?
People using an equalizer for the first time often turn the sliders at random. This short overview of the ten bands in Ampado helps you get there faster:
- •48 and 64 Hz, sub-bass: the punch you feel more than you hear. Kick drum and bass in electronic music and hip-hop.
- •125 and 250 Hz, bass and warmth: the foundation of bass guitar and voices. Too much sounds muddy and boomy.
- •500 Hz and 1 kHz, mids: the body of many instruments. Too much sounds hollow or boxy, too little sounds thin.
- •2 and 4 kHz, presence: this is where the intelligibility of voices sits. A little more brings speech and vocals forward, too much quickly gets harsh and tiring.
- •8 and 12 kHz, brilliance and air: cymbals, breaths and sparkle. A little more opens up the sound, too much starts to hiss.
A tip from the recording studio: cut what bothers you rather than boosting everything else. If you boost many bands a lot, the signal gets louder and can distort. Keep comparing with the original using the EQ button, because your ears get used to a sound quickly.
Five preset ideas to recreate
These settings are a good starting point. Recreate them, listen closely, adapt them to your ears and your gear, and save them as your own preset:
- •Laptop speakers: cut 48 and 64 Hz clearly, the small speakers can’t reproduce them anyway. Boost 125 and 250 Hz slightly, and add a little at 4 kHz.
- •Podcasts and audiobooks: cut 48 to 125 Hz, boost 2 and 4 kHz. Voices become clearer, even with background noise.
- •Bass boost: boost 48, 64 and 125 Hz, cut 250 Hz slightly so it doesn’t get boomy.
- •Late at night: at low volume, the ear perceives bass and treble less. A gentle boost of the outer bands, similar to the bathtub preset, makes up for it.
- •Bright headphones: cut 4 and 8 kHz slightly if cymbals and S sounds get on your nerves over time.
Equalizer and custom presets in Ampado PRO
The equalizer with custom presets is part of Ampado PRO. In the free version Ampado (lite) you see the section with a PRO note. With PRO you also get visualizers, playlists, the Auto-DJ, loudness analysis and much more.
Frequently asked questions
Does the Mac have a built-in equalizer?
macOS has no system-wide equalizer. Apple’s Music app comes with its own equalizer, but it only applies to the Music app. Ampado has a 10+1-band equalizer with frequency display and custom presets for your files, playlists, the Auto-DJ and internet radio.
How do I save an equalizer setting as a preset?
Set the sliders in the Equalizer section, click Save, enter a name and confirm with Return. The preset then appears as a button of its own and in the Equalizer › Presets menu.
Can I transfer my EQ presets to another Mac?
Yes. Choose Export Custom Presets… in the Equalizer menu, copy the file to the other Mac and load it there with Import Custom Presets….
Does the equalizer work with Apple Music?
No. Apple Music plays through Apple’s own system, and Ampado has no access to its sound. Waveform and visuals still work with Apple Music in Ampado. The equalizer works with everything else: your own files, playlists, the Auto-DJ and internet radio.
Find your sound
You get the equalizer with custom presets with Ampado PRO for $7.99 as a one-time purchase without subscription. Once set up, your favorite sound is always just one click away.