Frequency Colors in the Waveform
Bass in red, mids in green, highs in blue: the waveform can now be colored by frequency range, just like you know it from DJ software. That way you see not only how loud a track is, but also how it sounds.
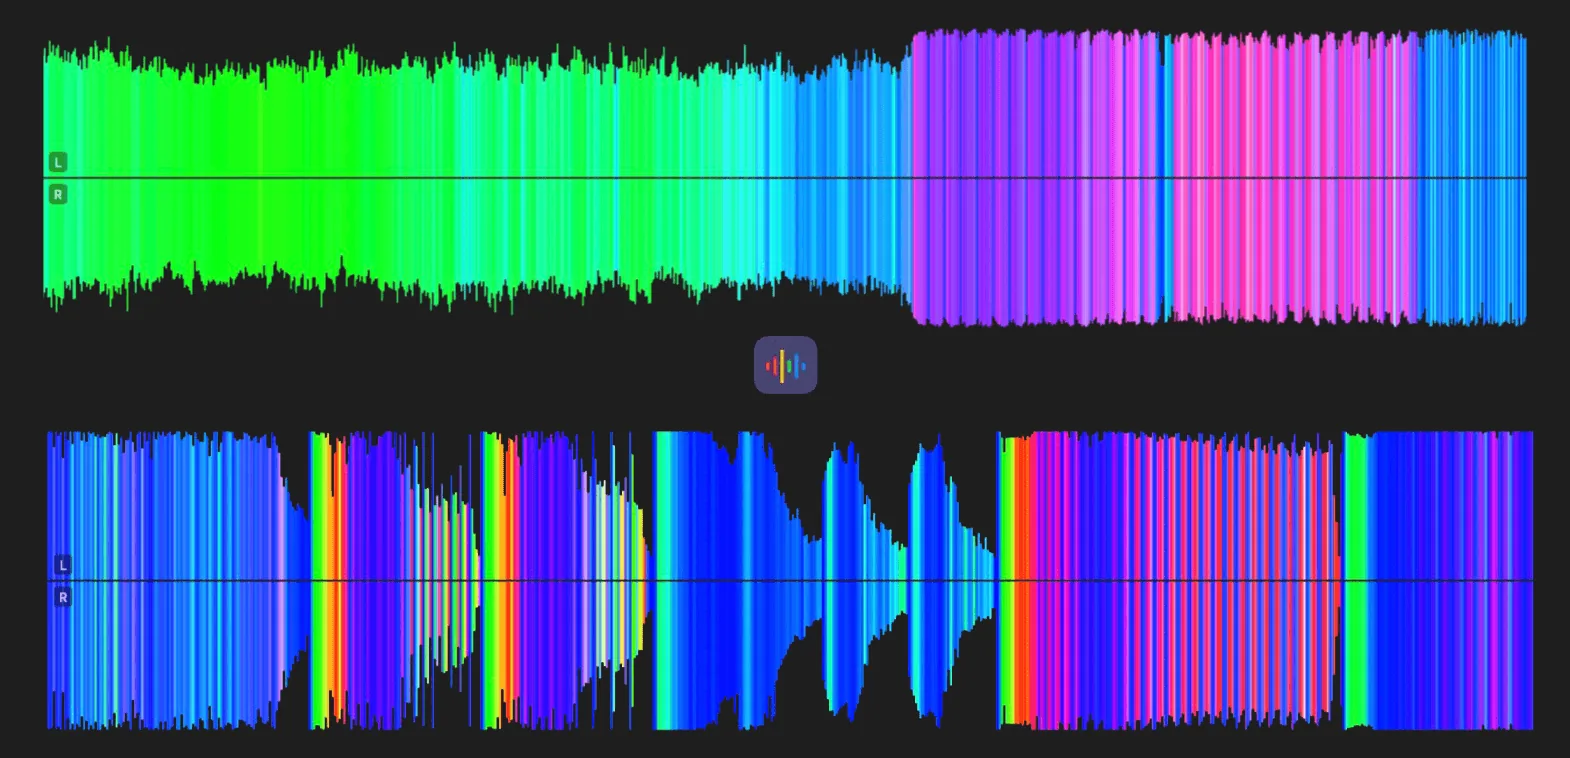
The waveform in Ampado PRO with frequency colors: bass red, mids green, highs blue
A classic waveform shows you where a track is loud and where it is quiet. What it doesn't show: what kind of sound is playing. A booming bassline and a hissing hi-hat look almost identical in a single-color waveform.
This is exactly where the new frequency colors come in. Inspired by DJ software, Ampado PRO can now optionally color the waveform based on the frequency content of the music. That way you recognize bass, mids and highs at a glance, even before you press play.
Red, Green and Blue: How Frequency Colors Work
Ampado splits the audio signal into three frequency ranges and gives each one its own color. Low frequencies below about 200 Hz, meaning bass and kick drum, appear in red. Mids between about 200 Hz and 2.5 kHz, where vocals, guitars and synths sit, appear in green. Highs above about 2.5 kHz, meaning hi-hats, cymbals and sibilants, appear in blue.
The colors aren't simply switched, they are mixed, just like the proportions in the sound. A section with strong bass and vocals glows yellow to orange, mids and highs together turn turquoise, and when everything plays at once, the waveform becomes almost white. The result is a colorful picture that reflects the character of every moment in the track.
Read the Track at a Glance
With frequency colors, the structure of a song becomes visible instantly. A breakdown without a kick drum suddenly loses its red, a drop kicks in with a strong red block, and a quiet intro with hi-hats shimmers blue. You find the spot you are looking for without having to listen first.
This is especially handy when you prepare a DJ set, plan transitions, look for samples or go through long recordings. It helps with podcasts and voice recordings too: speech sits mostly in the mids and glows green, while annoying hum or sibilants stand out by their color.
How to Turn On Frequency Colors
Move your mouse over the waveform and, in the color section of the waveform toolbar, click the frequency colors icon  . Alternatively, you will find the option in the menu bar under View → Show Waveform Frequency Colors, or you can use the shortcut OPTION+CMD+7. Frequency colors are off by default, and then your waveform looks exactly as usual, in your own waveform colors.
When you first turn them on, Ampado analyzes the frequencies of the current file. The existing waveform stays visible until the colors have been calculated. The result is saved together with the waveform, so the next time you open the file, the colors appear instantly. As long as frequency colors are turned off, no additional analysis takes place, not even when you open large folders.
Works with All Waveform Features
Frequency colors work together with all other waveform features. You can zoom, set markers and regions, and also combine the colors with the new channel separation, which shows the left channel on top and the right channel below.
Frequency colors work with your own audio files in mono and stereo, as well as with songs from your local Apple Music library. They are not available for Internet Radio and streamed Apple Music tracks, since there is no file to analyze.
An Ampado PRO Feature
Frequency colors are part of the extended waveform options of Ampado PRO. The free version (lite) includes the full player with waveform, but not the frequency colors. Ampado PRO is a one-time purchase with no subscription, available on the Mac App Store.